
2 days
1 hour
12 pers
Dessert
Italy
In our interview with Francesco Di Salvo we spoke about why modern, open-crumb panettone is having a huge popularity surge. This open-crumb panettone— or "panettone alveolato"—takes everything people love about classic panettone and makes it feel lighter, taller, and more expressive. The crumb is a feathery honeycomb of large, irregular alveoli that gives every bite a soft, custardy melt without heaviness. That structure lets aromas sing—vanilla, citrus zest, good butter, a whisper of fermentation from lievito madre—so flavor reads cleaner and more layered.
It’s also the ultimate process bake. The result doesn’t come from a magic ingredient; it comes from balance and control: from a well-tuned lievito madre (stiff starter), to gentle handling and gluten management throughout the process. Each detail matters and will transform a good dough into that dramatic slice with cathedral-like holes.
No surprise it’s surged in popularity. Pros and home bakers alike are chasing that “honeycomb reveal,” and bakeries are offering modern takes alongside the classics. It photographs beautifully, tastes luxurious yet airy, and showcases skill—making it a perfect centerpiece for the season and a rewarding project any time of year.
Premise: process > recipe
For a truly open-crumb panettone, the formula matters—but the process matters more. Open crumb isn’t a trick ingredient; it’s the result of:
A well balanced lievito madre: it should be vigorous, not too lactic and too acetic.
Consistent temperature management across the entire process to protect the gluten network, and favor the development of the right bacteria
Gentle handling with a minimal pirlatura to avoid degassing.
A good recipe helps, but your success rides on the starter's management, mixing sequence, and temperature control.
Ingredients
This recipe is measured for two 1kg panettone
For the first dough:
Panettone flour 378 grams
Water 190 grams
Lievito madre ~110 grams
Sugar 120 grams
Egg yolks 110 grams
Butter 165 grams
For the second dough:
All of the first dough
Panettone flour 150 grams
Water 40 grams
Sugar 100 grams
Egg yolk 110 grams
Butter 200 grams
Honey 30 grams
Diastatic malt 6 grams
Salt 8 grams
Optional: orange paste, vanilla bean
"Sospensioni / inerti" 500 grams, you can get creative here, with candied fruit, candied orange, or chocolate
Want to make Panettone at home? Our all-in-one kit has everything you need to get started.
Modern Panettone Recipe
Step 1 - Yeast preparation
A balanced lievito madre is the most critical prerequisite to a successful modern, open-crumb panettone. The topic requires its own series of posts- but in essence, you want to start with a pasta madre coming from a long night feed balanced, strong and vigorous.
On the day of, we recommend doing two preparatory feedings:
- 1st prep feeding:
- 1:2 ratio with 45% hydration
- 27-28C for ~4-4.5 hours
- Target final pH of 4.10-4.20
- 2nd prep feeding:
- 1:1/1:1.5 ratio with 45% hydration
- 28-30C for ~3.5-4 hours
- Target final pH of 4.10-4.15

Step 2 - Mix the First Dough
The first dough builds the foundation for the panettone. We start with water, flour, sugar, and pasta madre. Our goal is to develop a strong gluten network that can support the yolk and butter.
We want to mix the first ingredients for 6-8 minutes, until the dough has some extensibility, while still remaining thick and elastic. At this point we can proceed to slowly add the yolk. Once the yolk is fully incorporated, we can add the butter.
It's very important to keep the dough temperature under control during mixing. The dough temperature should not exceed 28C, and ideally stay below 26C. For us, using cold ingredients and cooling the mixer bowl helps manage the temperature.
The final dough should be extensible, yet hold its shape firmly as shown in the video.
The dough is now put to rest. We recommend leaving it at ~24/25C (75-77F). At this temperature, it takes anywhere between 12-18 hours to fully mature.
The dough is fully matured when it's grown about 3-4x in volume. The ideal pH at this stage should be 5.1-5.3. It's critical that yeast activity and bacterial activity proceed at a comparable pace. If the dough rises to 4x before the pH can drop enough, or if the pH drops much faster and before the dough can triple in volume, it's likely an issue with your lievito madre.

Step 3 - Mix the second Dough
Just as in the first dough, temperature management and gluten development are critical to this step. Start with the first dough, the flour and the malt. The gluten must fully develop before proceeding to add the fats. This should take 10-15 minutes, and reach the consistency in the video.
Then, add the yolk and sugar little by little. Once incorporated you can add the salt and the butter, and finally, slowly, the water. Once the water is fully incorporated, turn the speed on minimum and add the sospensioni.
The entire mixing should take 25-35 minutes and the gluten should be well preserved. The dough should feel extensible yet it should not be frail, and it should hold its shape well. Temperature management is key during this step. Never exceed 27C.
Step 4- "Bulk Fermentation"
After mixing, we perform a simple lamination, then we leave the dough to rest at 28C/82F for about 1 hour, or enough time to let fermentation kick in.
The dough should not rise during this step, but should feel fuller when touched, sign that the fermentation has begun.
Step 5 - Preshape
Preshaping is critical to organize the gluten so the final shaping (pirlatura) is clean and gentle.
Lightly butter/oil the bench and your hands. If you are making multiple panettone, you can divide the dough during this step. Keep handling minimal, give the dough a couple of gentle folds, and leave to rest for 20-30 minutes, uncovered.

Step 6 - Final shape and rise
After 20-30 minutes, the top should have formed a thin "crust", which will make the dough easier to handle in this phase.
Give the dough a couple small folds, then proceed with the pirlatura (twisting the dough gently on itself). Remember to be extremely gentle and avoid degassing - this is critical to achieve an open-crumb panettone. The dough should stay tall and taut.
Now, place the panettone in the mold and leave the dough to rest. The final rise is over when the dough reaches 3-5 cm from the border of the mold when using a tall-shaped mold. We measure this distance on the mold (not in the center of the dough).
You can leave the dough to rest at 24-25C (75-77F) or, if the gluten is in good condition, you can push this final rise up to 28-30C (82-86F). The time needed will vary based on many factors, but typically at 28-30C it should take anywhere between 5-7 hours.

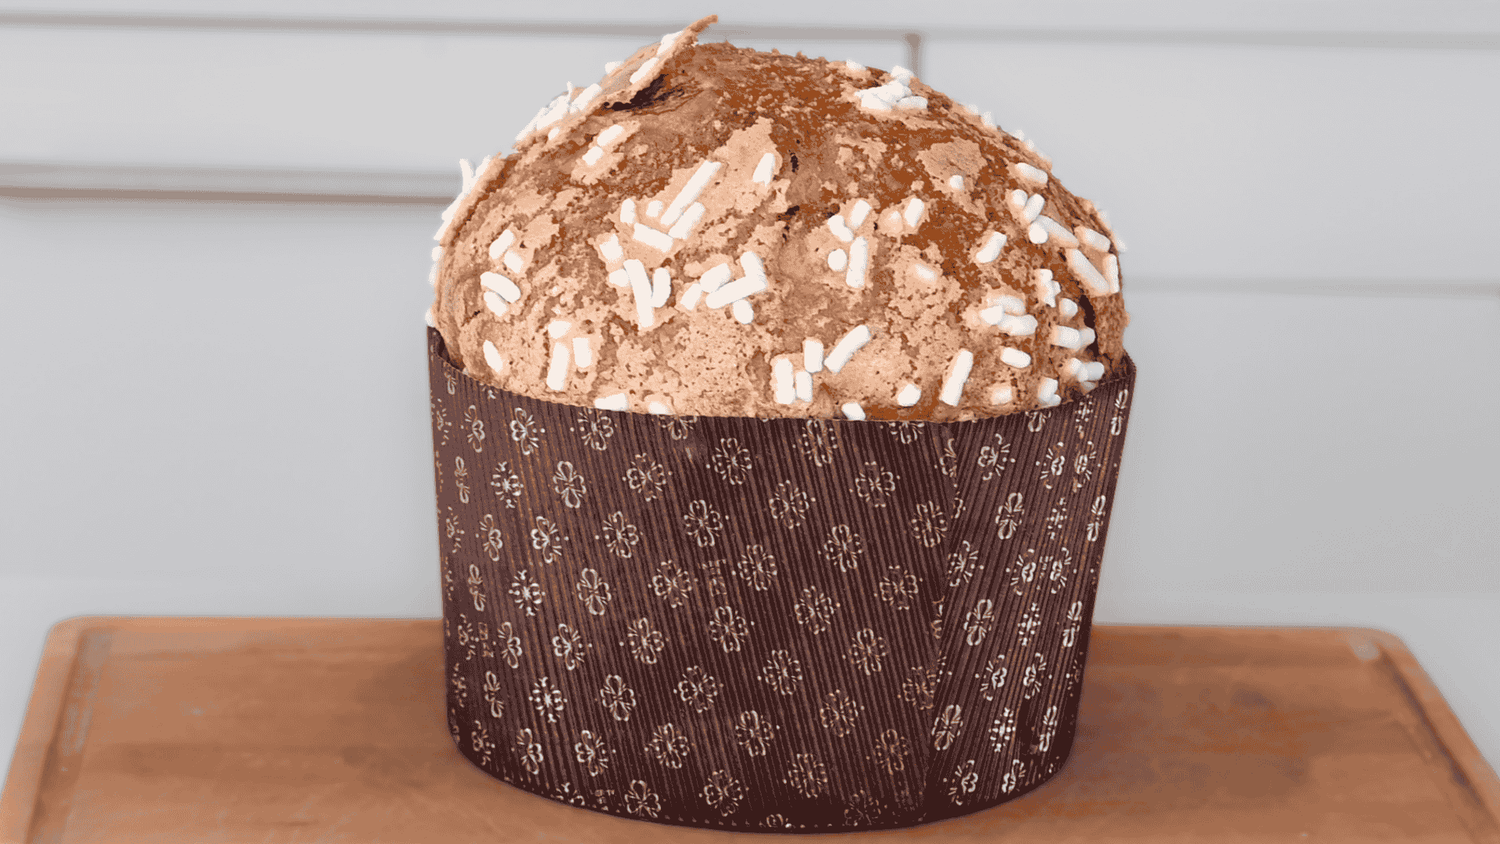
Step 7 - Glazing
You can glaze your panettone, or keep it traditional and go for the "scarpatura" (a cross cut at the top). If opting for the latter, just leave a small amount of butter at the center of the cut. If glazing, make sure to apply a thin layer evenly. We love adding sugar nibs for extra crunch and flavor.

Step 8 - Bake!
Baking can make or break your open-crumb panettone. This is the culmination of two days of hard work, and you don't want to leave any detail unchecked.
We bake at 310F for about 60 minutes, but each oven is different and will require some adjusting. The Panettone needs to reach between a minimum of 92C/198F to a maximum of 96C/205F at its center.
After baking, the panettone needs to be immediately tilted upside down and left to cool for a minimum of 12 hours. We use our tilting pins, which come in extremely handy at home.
